
Have you been considering growing your own gourmet mushrooms, but just don’t know where to start? Well, it’s time to ditch your mushroom grow kit, and let us show you how you can grow gourmet mushrooms on your own. But first, let’s cover a few basics.
Why should I grow mushrooms?
Even though mushrooms are on the Clean 15 list, that doesn’t mean that they are actually pesticide free! A study done by the FDA shows that 26% of imported mushrooms had more than the allowable amount of pesticides, even thiabendazole, a carcinogen, and a developmental and reproductive toxin.
Pesticides are not our only concern with commercial mushrooms. Gourmet mushrooms are expensive and can be hard to find at your local store, but don’t let that stop you from capitalizing on the many benefits mushrooms provide!
Is it difficult to grow mushrooms?
Although it may seem tricky at first, once you understand the basics of growing mushrooms, the process is pretty simple! Take care to prevent contamination, monitor temperature and humidity, and you will be enjoying fresh, homegrown, gourmet mushrooms before you know it!
Is it dangerous to grow mushrooms?
Nope! Follow our guidelines below and wear a respirator when you are exposed to mushrooms that are in the fruiting phase – this is when they release spores. If you are going to be using a pressure cooker or autoclave, be sure to adhere to all of the manufacturer’s instructions.
Step 1: Prepare your substrate
When it comes to choosing a substrate, you have quite a few options. We have seen the best results using sawdust, soybean hulls, wheat bran, rice bran, peanut hulls, sugarcane bagasse, or straw. Although this is far from a comprehensive list, the options above are tried and tested and should provide you with great results!
- Depending on the substrate, it may be beneficial to chop up your substrate before beginning the hydrating process — this will cut down on the time needed to hydrate and thoroughly mix your substrate.
- The next part is to hydrate the substrate. The water to dry mix ratio will be specific to your chosen substrate, so be sure to add the correct volume of water.
- After you have finished prepping your substrate, divide it evenly into mushroom bags. Fold the opening of the bag over to seal the substrate so it is ready for the next step.
Step 2: Sterilization
Sterilization is a very important part of the process. If not done correctly, your substrate can become contaminated and the contamination will compete with your mushrooms for nutrients.
There are two main ways to sterilize substrate:
- Atmospheric steam sterilization: This process involves keeping the bag of substrate immersed in steam for several hours until sterilization is reached. This method takes longer but is the safer option and the one we prefer.
- Autoclave or pressure cooker: Using this method is faster, but it is essential to take proper precautions whenever using an autoclave or pressure cooker.
Don’t forget to let your sterilized substrate cool completely before inoculating! You can even let your substrate cool overnight, although we don’t recommend letting it sit for longer than 24 hours.
Step 3: Inoculate the substrate
Be careful not to contaminate your grain spawn or substrate bags during this step. Pay close attention to your work during this process, since it is easy to introduce contaminants during inoculation. Contamination can easily go unnoticed, leading to problems later in the cultivation process.
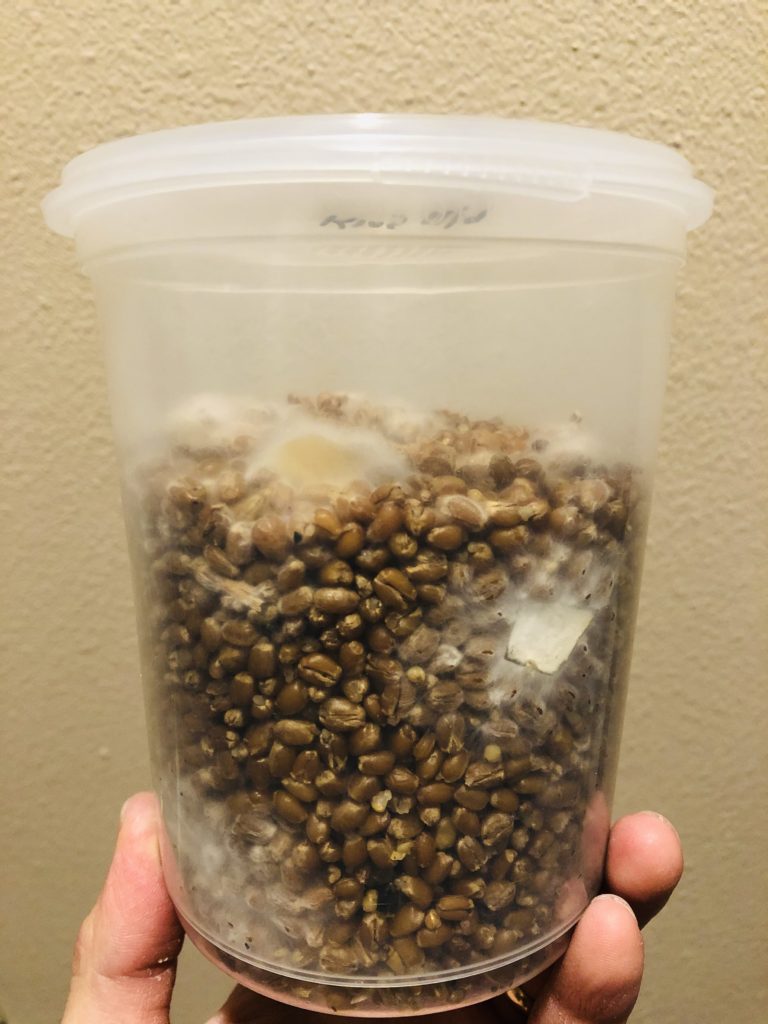
- After cooling the substrate, it’s time to inoculate. We recommend inoculating in a cleanroom or under a HEPA flow cabinet. This ensures that no mold spores, yeast, or bacteria will enter the bag and contaminate it. If you don’t have access to a HEPA flow cabinet, consider building or buying a still air box.
- Add the grain spawn to the substrate bag using a sterilized spoon or another sterilized tool. Try to put the same amount of grain spawn into each bag.
- Seal the bag closed using an impulse sealer. Don’t force any air out of the bag before sealing — this not only allows for air exchange but also makes mixing much easier.
- Thoroughly mix the substrate and grain spawn until you have a uniform mixture.
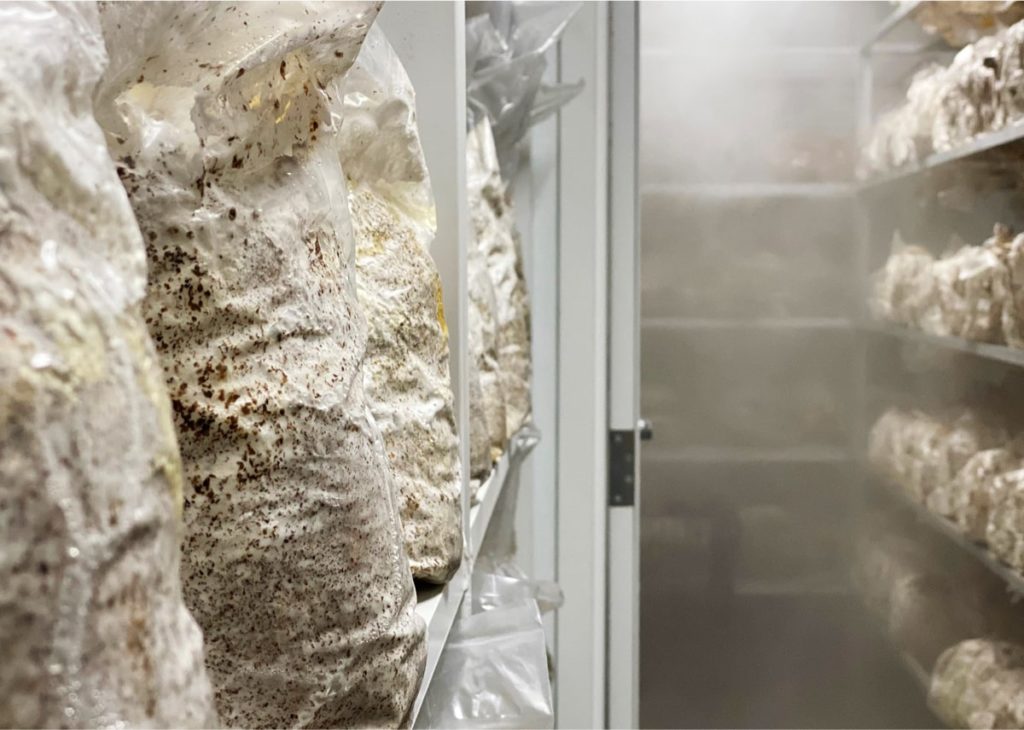
Step 4: Incubation
During incubation, the mycelium moves from the grains throughout the substrate colonizing it completely. Incubation time will vary depending on the species of mushrooms you are growing.
- Place the inoculated substrate bag in a room with the temperature set to the mid to low 70’s (Fahrenheit).
- Incubation usually takes between 2 and 3 weeks depending on species.
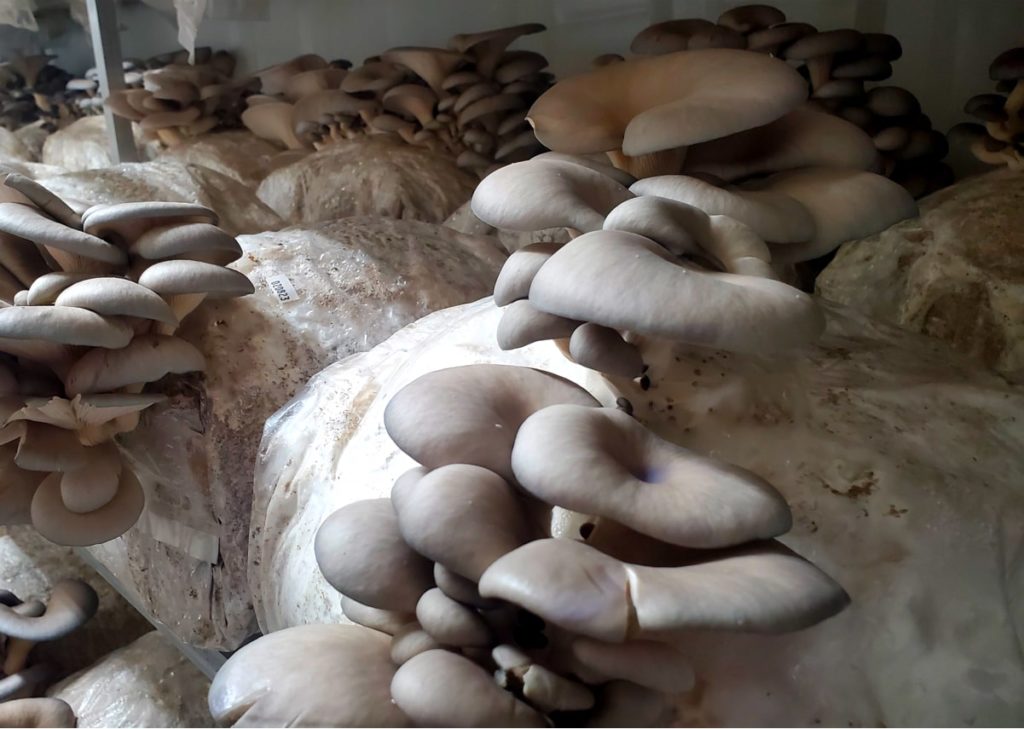
Step 5: Fruiting
After the substrate bags are completely colonized, the fruiting process can begin.
- Take the colonized substrate bags to a room with high humidity with the temperature set to the low to mid 60’s.
- Cut the bag open, exposing the mycelium to oxygen. At this point, the temperature drop and high humidity will act as biological triggers telling the mycelium to begin forming mushrooms.
- After about 2 weeks (just keep an eye on them), you will have mature mushrooms that are ready to be picked! Depending on the species, several harvests can be picked from each bag. After a bag has produced its mushrooms, the substrate can be composted or added to soil where it will continue to produce small quantities of mushrooms.
Not that hard, right? The ability to control temperature, humidity, and fresh air exchange is key to successfully growing mushrooms, and proper infrastructure is required to meet the varying needs of different mushroom species.
When you’re ready to take things to the next level, give us a call! Our Gourmet Mushroom Farms are equipped with everything you need to grow mushrooms on a large scale, and our amazing team is here to help you every step of the way.
View The FarmBox Gourmet Mushroom Container Farm