
Gourmet mushrooms are commercially grown in three stages. The ability to control temperature, humidity, and fresh air exchange is key to any cultivator’s success, and proper infrastructure is required to meet the different parameters required in each stage of growth.
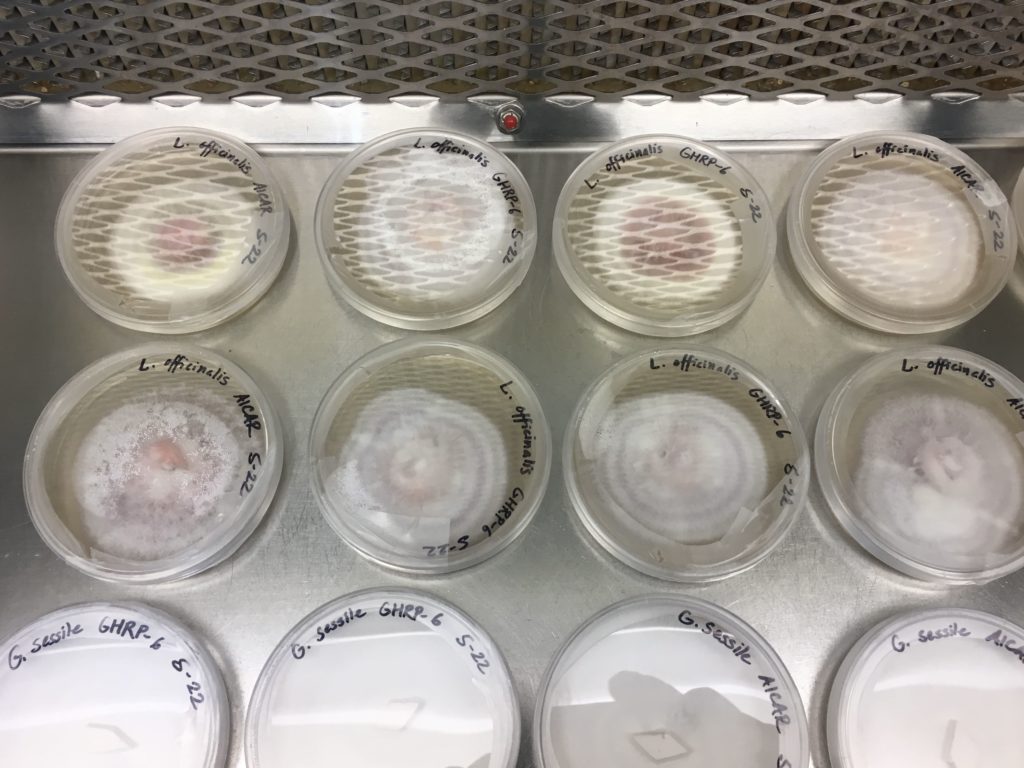
Stage 1: Petri Dishes
Mushrooms live most of their lives in a vegetative state called mycelium. In nature, mycelium grows in soil or decaying wood where it absorbs vital nutrients. These nutrient-rich conditions can be replicated in a laboratory setting using a specially formulated gel, called agar, that can be customized for a particular mushroom species. The commercial mushroom growing process begins by placing a small bit of mushroom mycelium onto a petri dish, and within several weeks the mycelial tissue replicates itself and covers the entire surface of the petri dish—this is referred to as colonization.
After a petri dish has been fully colonized by mycelium, cultivators can proceed in two directions:
- Divide the agar into small pieces and transfer the pieces to new petri dishes, where the mycelium will continue to expand (one petri dish covered with mycelium can serve to start about 80 new petri dishes). These new petri dishes can then be used for further propagation, or they can be used for the second option:
- Distribute the cut-up pieces of mycelium into receptacles of sterilized grains.
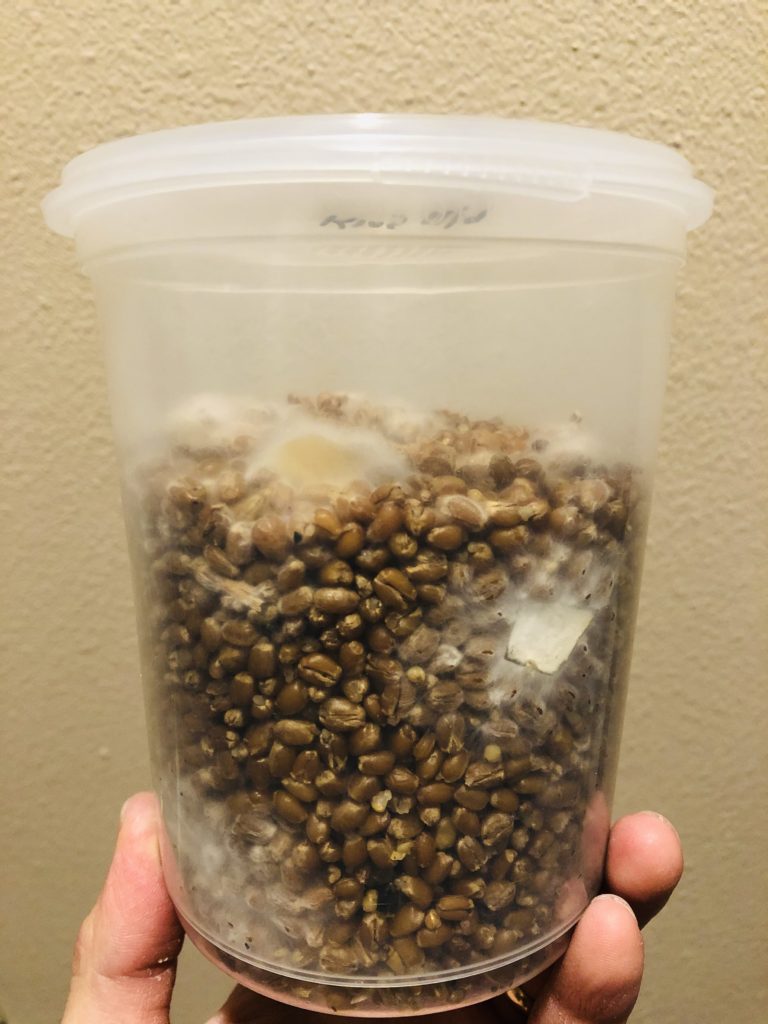
Step 2: Grains
After being introduced to sterilized grains (typically wheat, millet, and sorghum), the mycelium will begin to replicate and grow, metabolizing all available nutrients. This process typically takes several weeks so the mycelium can adjust to its new environment and nutrient availability. With these nutrients, however, comes the risk of contamination by other fungi and bacteria. Grains must be sterilized carefully prior to being inoculated with mycelium. Any lapse in attention during the inoculation process can lead to contamination and a lost grain bag (contamination can also go unnoticed, leading to problems later in the cultivation process). Once a grain bag is fully colonized with mycelium, the bag can be used for two purposes:
- Propagating the myceliated grains into other sterilized grain bags, or:
- Introducing the myceliated grains into bags of substrate suitable for growing the mycelium into its next stage—the production of fruiting bodies (mushrooms).
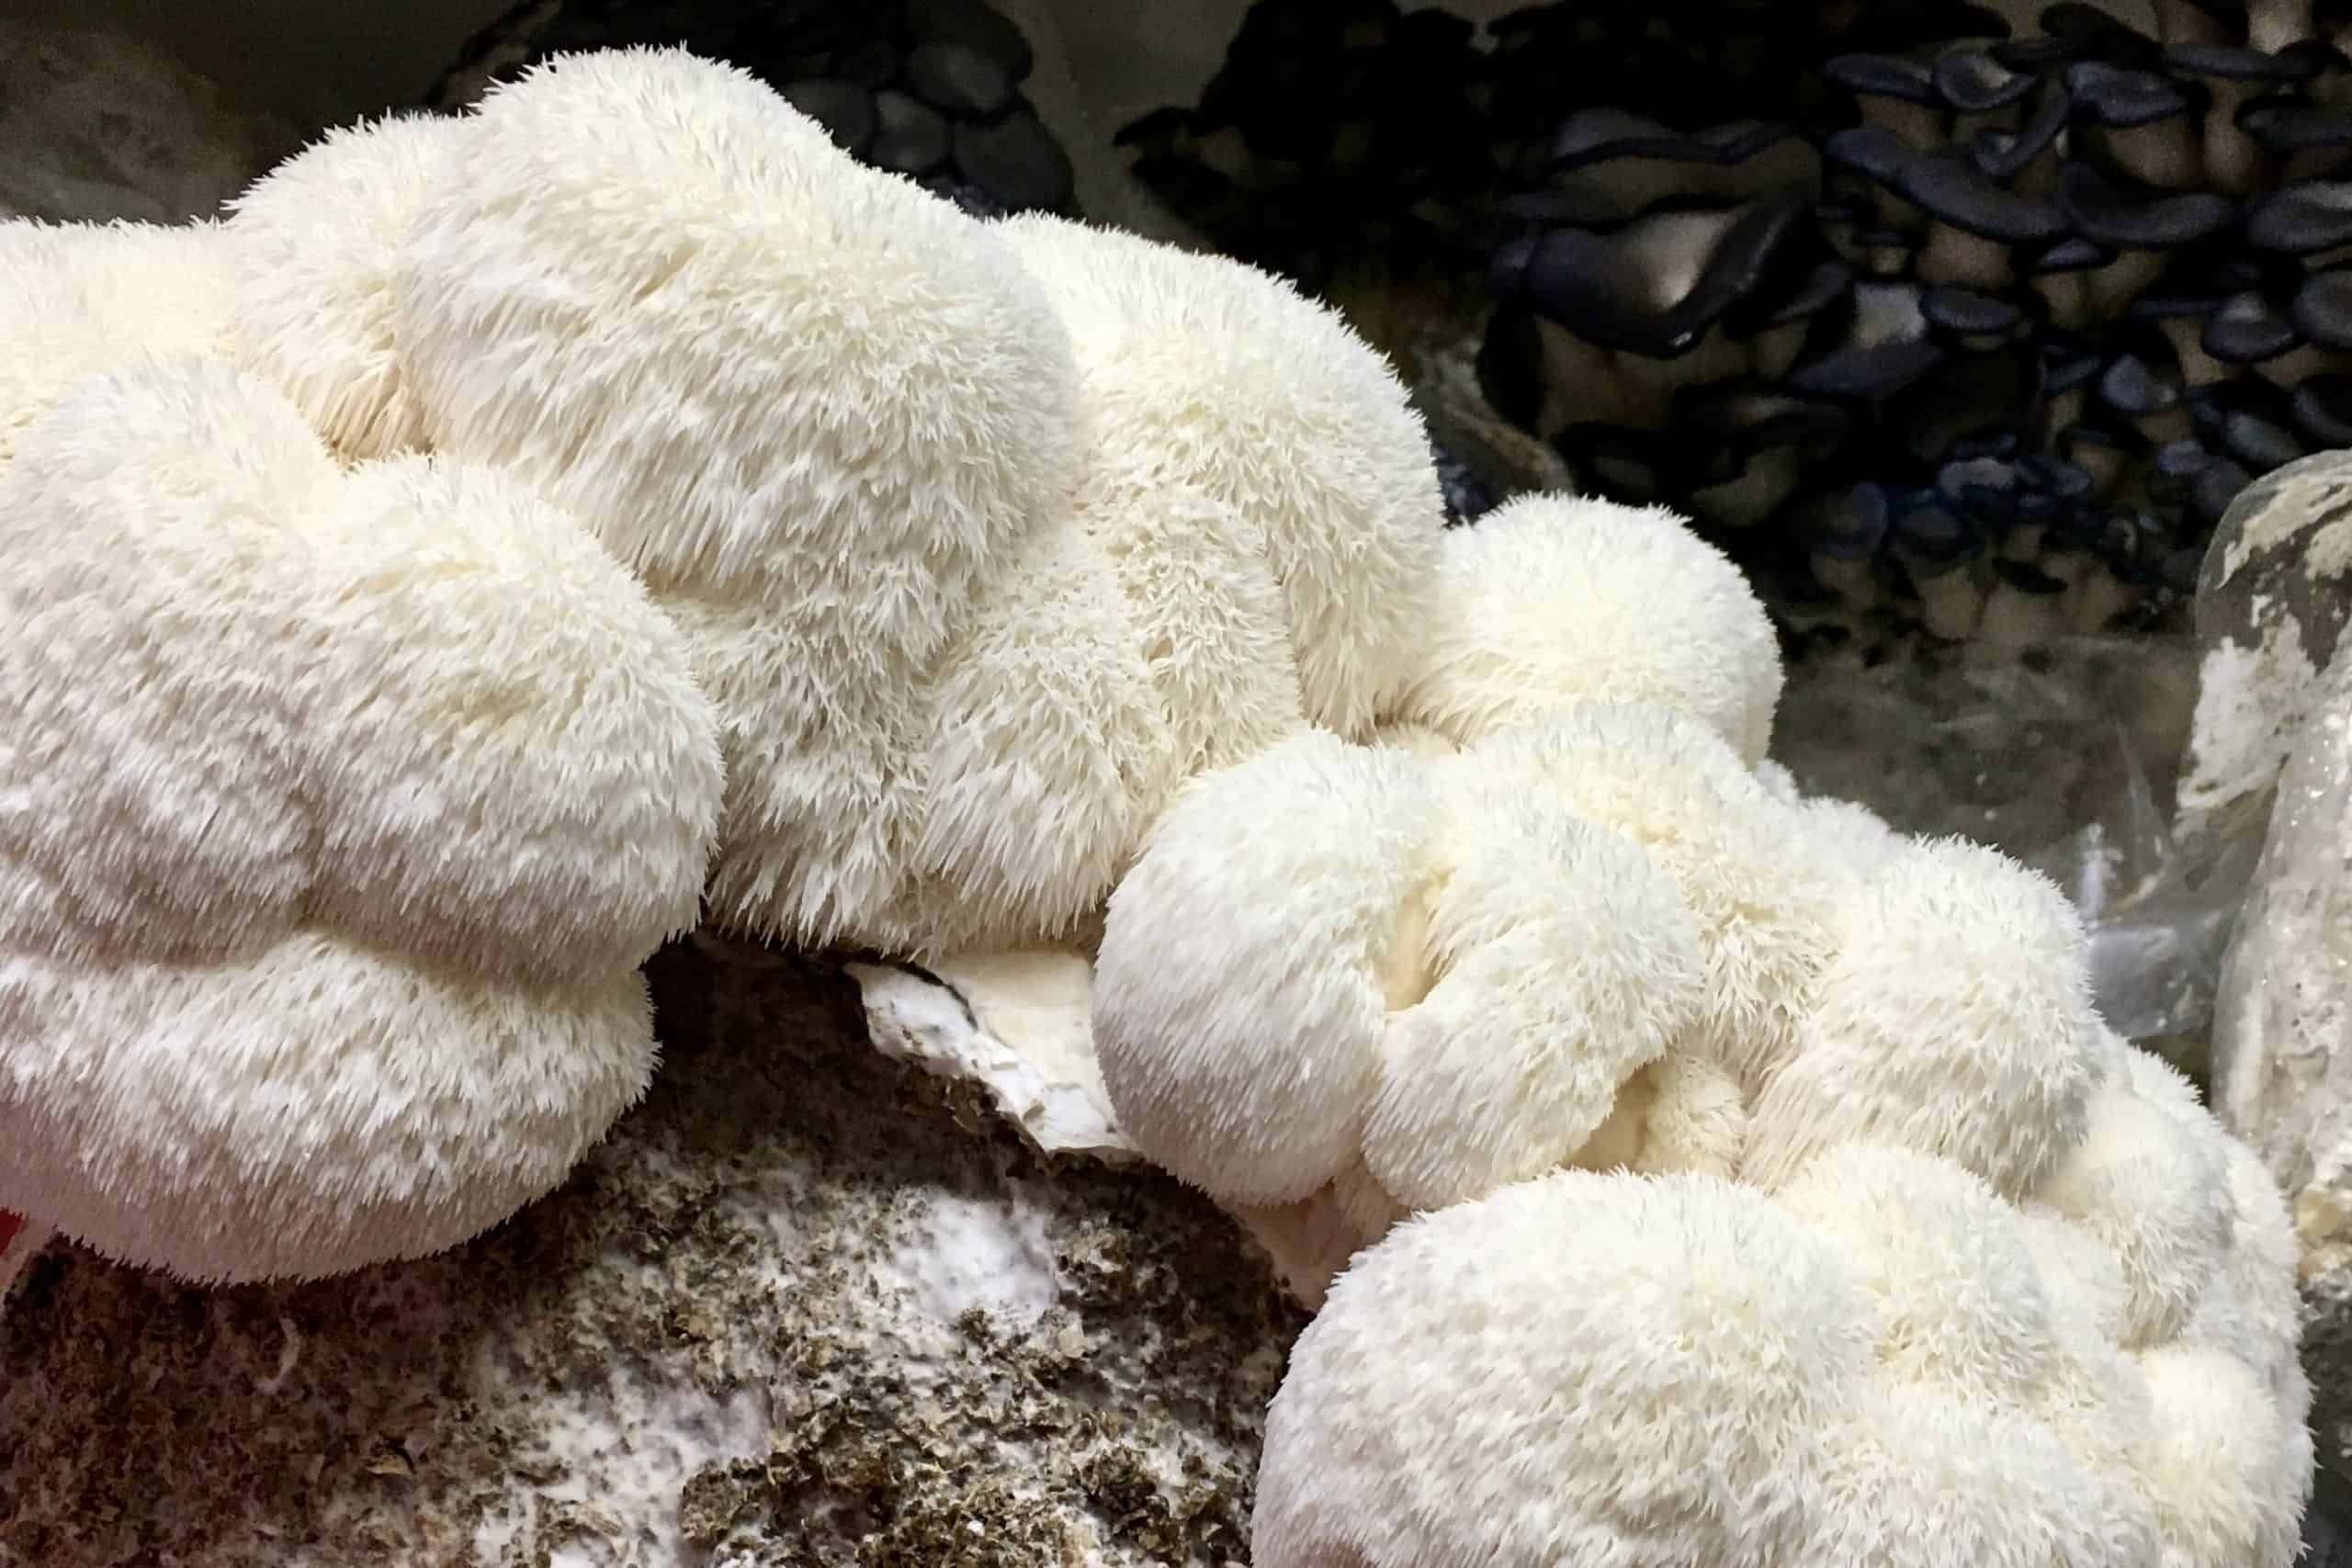
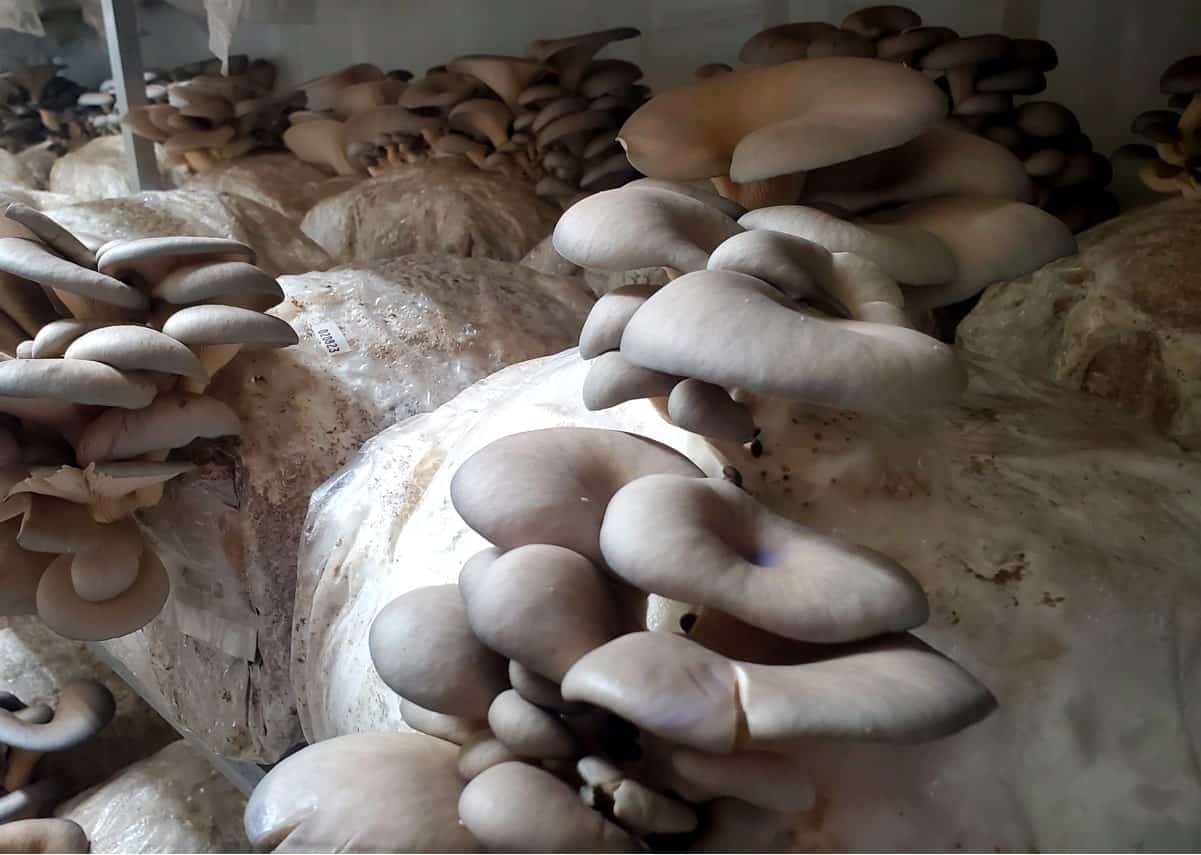
Step 3: Fruiting Substrate
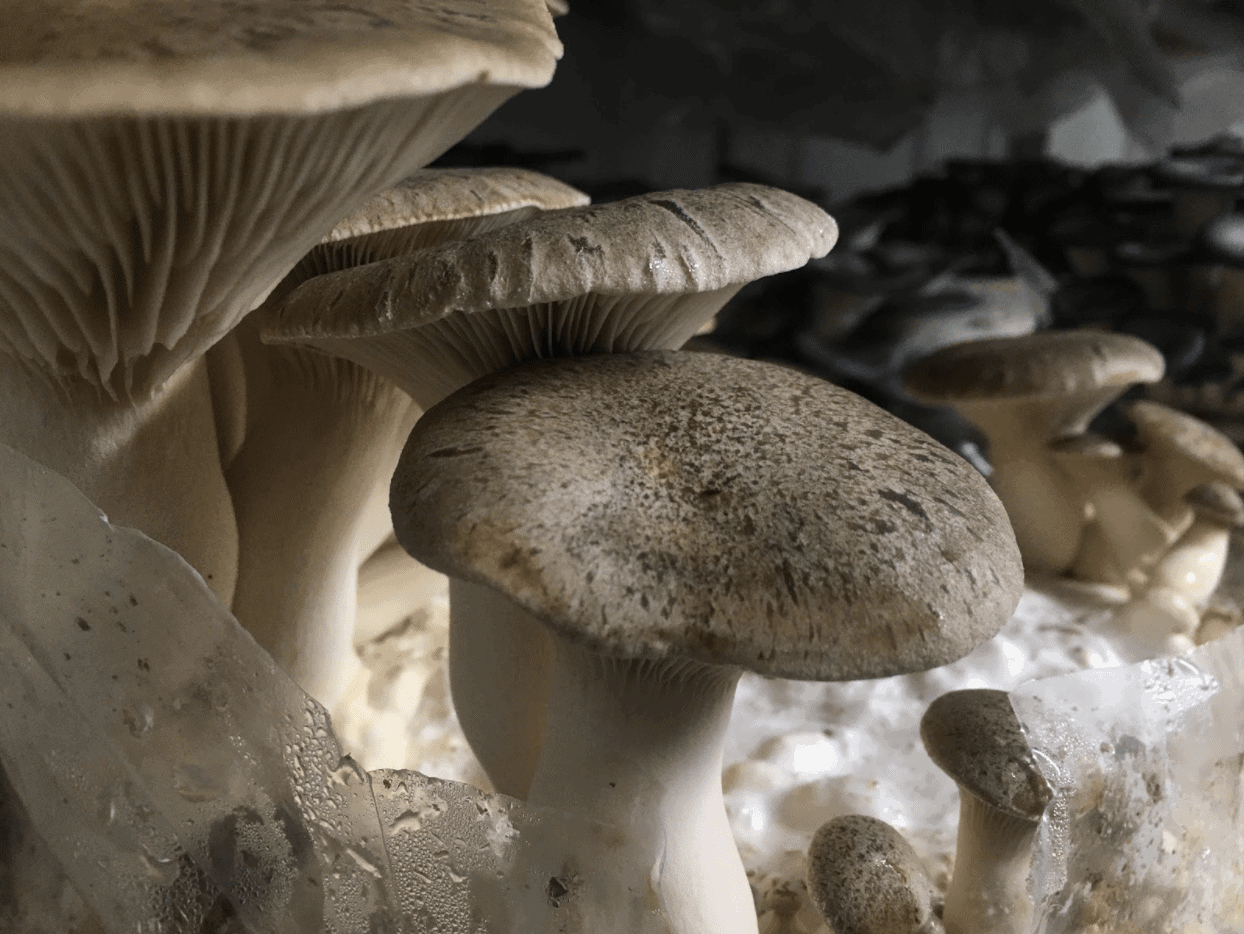
There are many substrate options for growing mycelium out to its final stage, where it produces mushrooms. Commercial cultivators in the West typically use hardwood sawdust supplemented with agricultural waste products—this can include soybean hulls, wheat bran, rice bran, sugarcane bagasse, and coffee grounds. Cultivators prepare substrate bags by mixing the dry inputs with a specific volume of water and then placing them in an autoclave for sterilization. After the substrate bags have cooled, cultivators shake the grain bags to break them up and then distribute them in small amounts to the sterilized substrate bags. The inoculated substrate bags will then remain in a temperature-controlled room for several weeks; the mycelium moves from the grains throughout the substrate colonizing it completely during this time. After the substrate bags are completely colonized, the substrate bags move into the fruiting chamber, where cultivators cut them open and expose them to lower temperatures, high humidity, and fresh air. After several weeks, mushrooms will be fully formed and ready for harvest. Depending on the species, several harvests can be picked from each bag. After a bag has produced its mushrooms, the substrate can be composted or added to soil where it will continue to produce small quantities of mushrooms.
View The FarmBox Gourmet Mushroom Container Farm